Pet Portraits Studio and Materials – Behind the Scenes
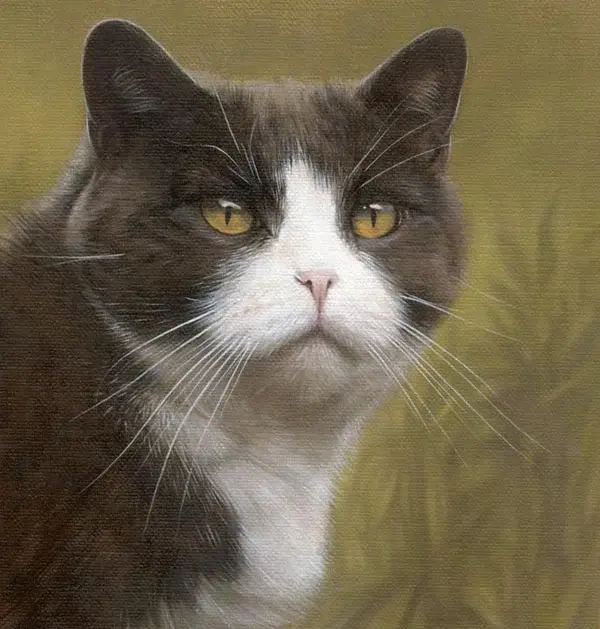
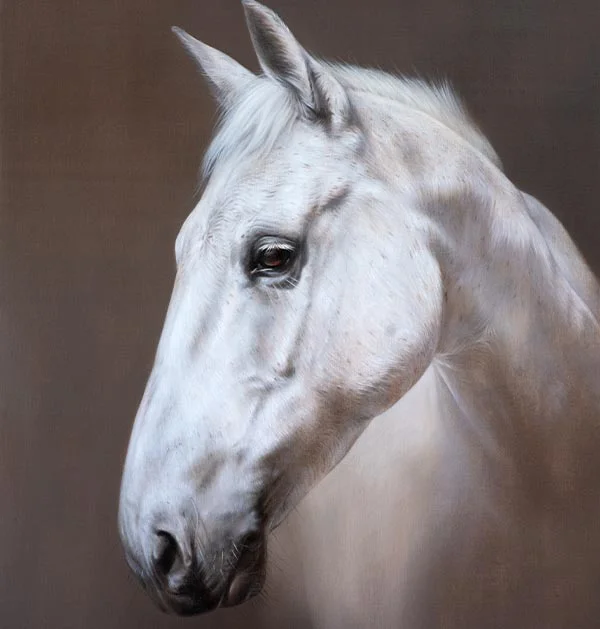
Melanie Phillips and Nicholas Beall create their professional pet portraits from a custom-built art studio in rural Wales, UK. Established in 2014, their 20 x 14 foot studio is fully insulated and equipped with professional lighting, separate workstations for oil painting and pencil drawing, and archival-grade materials. Both artists work exclusively with traditional techniques - Melanie specializes in graphite pencil portraits while Nicholas focuses on oil paintings of dogs, cats, and horses.
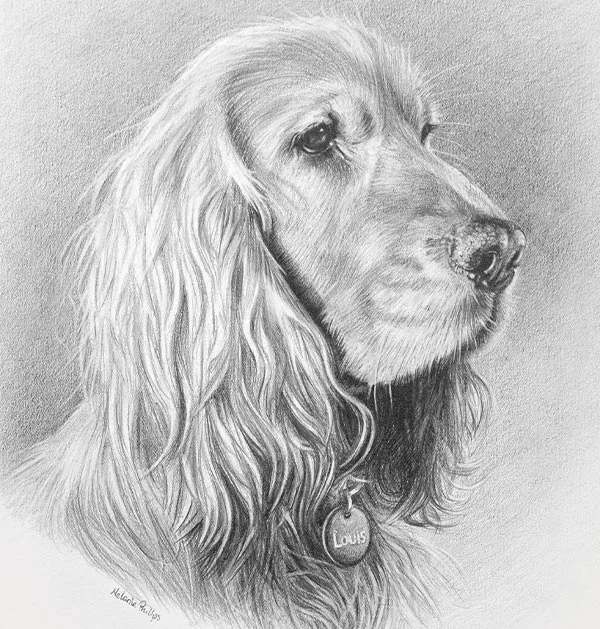
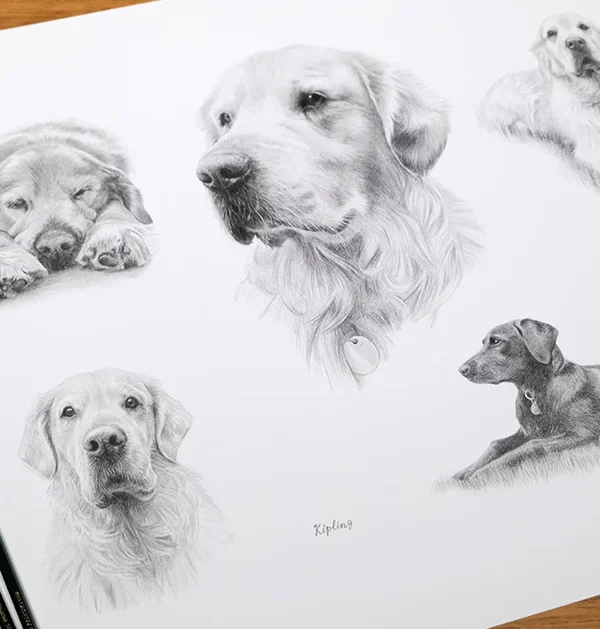
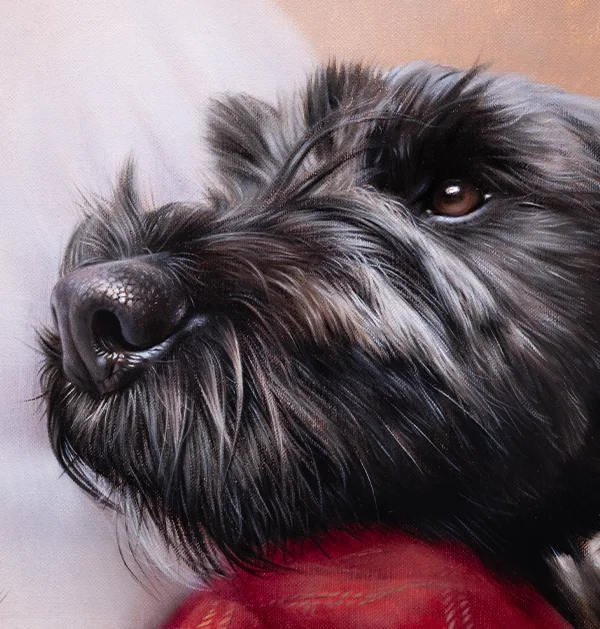
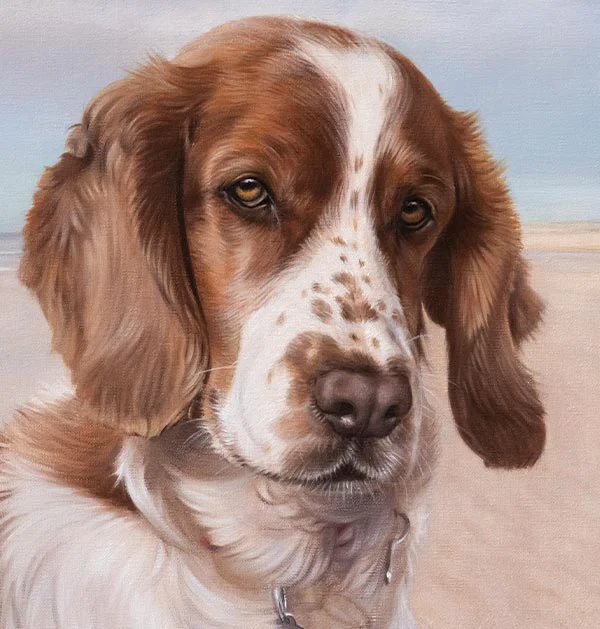
Welcome to our pet portraits studio, where we create all of our bespoke pet portraits! As you may already be aware, my name is Melanie, and I draw all of the pencil portraits. My husband, Nicholas, is the oil painter, creating traditional hand-painted dog and animal portraits.
We hope you enjoy reading about where we live and our garden art studio, along with viewing all the photos too.

Our Custom Garden Studio
We have been in business since 1996, and for years we worked from whatever room we could — a spare bedroom, a corner of the house, anywhere with space. In March 2014, we finally converted our 20 x 14 foot workshop into a full-time studio.
Studio Specifications
- 20 x 14 foot custom-built art studio
- Tucked away in peaceful wooded garden area
- Full insulation top to bottom
- Tongue and groove walls with double glazing
- Triple-layer felt roof for weather protection
- Year-round heating system for comfort
It's tucked away in a peaceful wooded part of our garden, away from the cottage and lane — a perfect, quiet spot for work. We had builders insulate it top to bottom, install floorboards, tongue and groove walls, double glazing, and a triple-layer felt roof.
With a heating system too, it's warm and cozy year-round — pure bliss.

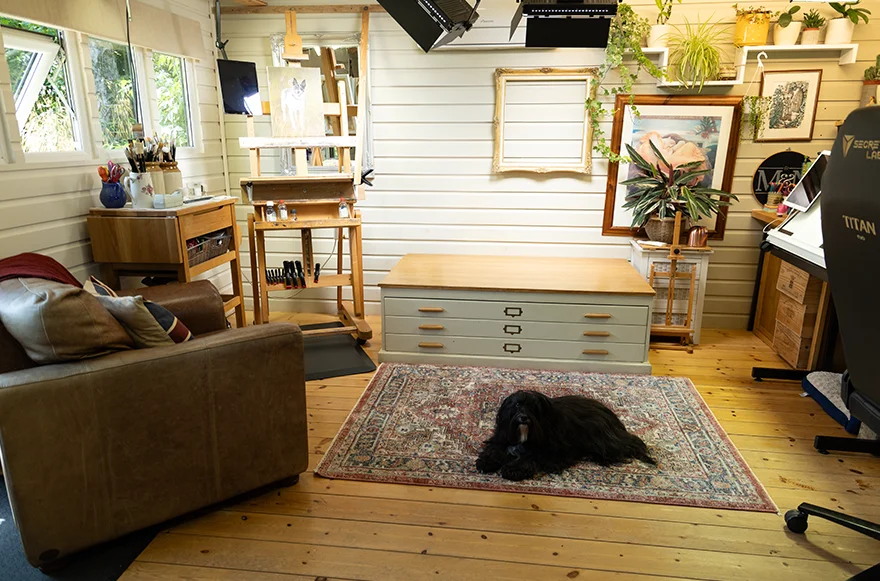
Melanie's Pencil Portrait Workspace
We have created a lovely work environment that suits us both. It's taken me a while to get my area just how I wanted it. I envisaged being surrounded by lots of plants and greenery with shelving where I had access to keep my art materials and packing, which I am managing to achieve as you can see.
Melanie's Setup Features
- Tilted drawing desk for ergonomic pencil work
- Plan chest for storing all paper types
- Dedicated pencil storage unit behind chair
- Under-worktop storage for supplies
- Plants and greenery for inspiration
- Organized shelving for materials and packing
I use a tilted drawing desk. The plan chest holds all of my paper and I have a little unit behind my chair with all of my pencils in. Under the worktop there is more storage.
Having a setup that works well not only to look aesthetically pleasing but to also work well for daily use is really important.

Nicholas's Oil Painting Station
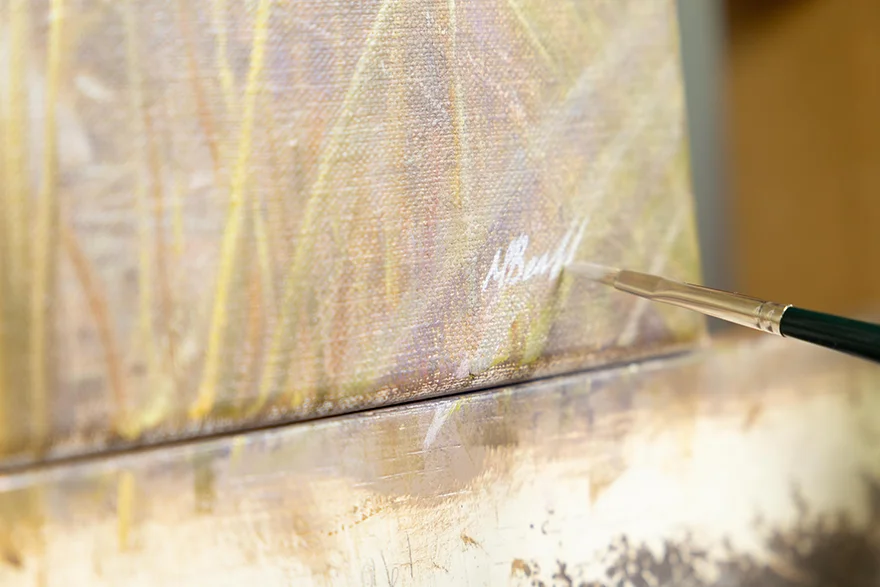
Nicholas prefers to stand at his easel and I snapped this photo while he was just looking at Lily, it was a complete fluke that I caught the moment between them just right. His oak kitchen trolley holds all of his oil paints, brushes, and mixing tools.
Nicholas's Setup Features
- Professional standing easel for oil painting
- Oak kitchen trolley for paint organization
- Perfect height for easy access while painting
- Kitchen roll holder for quick cleanup
- Multiple lighting sources around workspace
- Positioned next to window for natural light
It's the perfect height for keeping everything he needs there while painting. It even has a kitchen roll holder, perfect for cleanup! You can also see all of his lighting around him along with being right next to the window so it's a lovely light space and environment for him to work.
It's a simple but efficient layout that he loves.

Working from Reference Photos
Nicholas uses a few different ways to view reference images while he paints. It depends on the subject and how complicated the commission is. Sometimes he prints photos and sometimes he uses his iPad.
Reference Photo System
- Mounted iPad system for digital reference viewing
- Special iPad mount attached to studio beam
- Eye-level positioning for easy viewing while painting
- Printed photos for complex commissions
- Flexible system depending on subject complexity
The iPad is fairly old now as it goes onto a special iPad mount which you can't seem to buy anymore. So let's hope our iPads last another few years yet! It's mounted to a beam so keeps everything at eye level.
Every part of the studio is designed to make the creative process as smooth as possible.
Art Studio Features
We have tried to design our studio in such a way that we have different work stations for different tasks. Obviously we each have a drawing and painting area with space around us to spread out for larger projects. We have each worked on larger canvases and drawings up to 40" x 30" so space is required when we are working on projects like these.
The packaging desk is another hugely important area. We need space to spread out the packing materials and make sure the area is clean for packing the portraits.
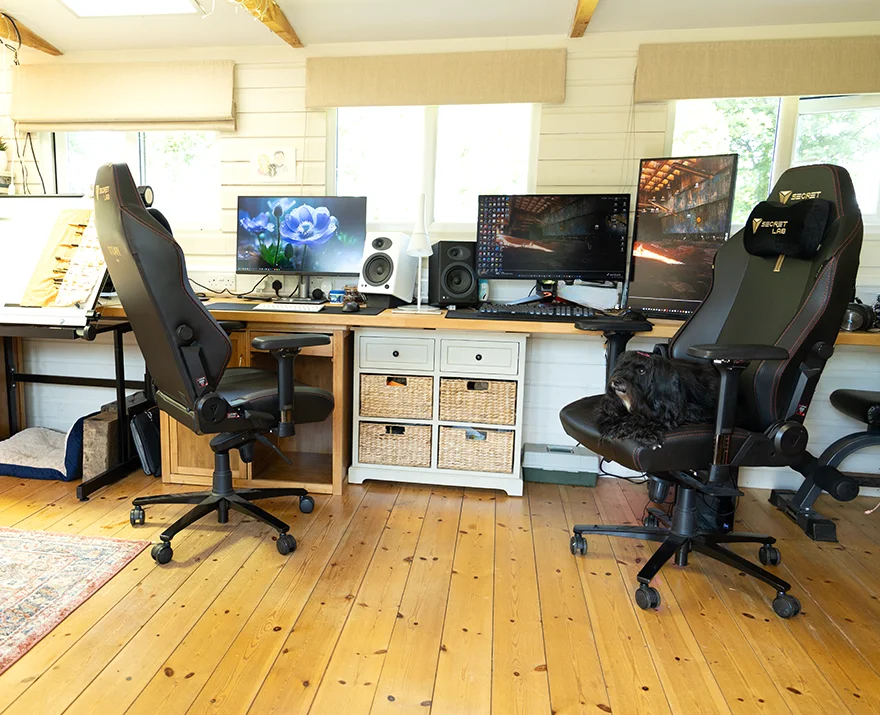
Then our office area is also an important place, as it's where we do the mock-ups, chat to clients and of course design and maintain the websites and socials.
We have another section of our studio that is dedicated to workout equipment that is not pictures. We have a large running machine, a cross trainer and a rowing machine. Along with numerous weights and kettlebells. Time is always short in our lives and they absolutely should be used more... work is always busy!
Complete Studio Features
Our studio is designed to handle every aspect of creating pet portraits, from initial sketches to final photography of completed works.
Full Studio Capabilities
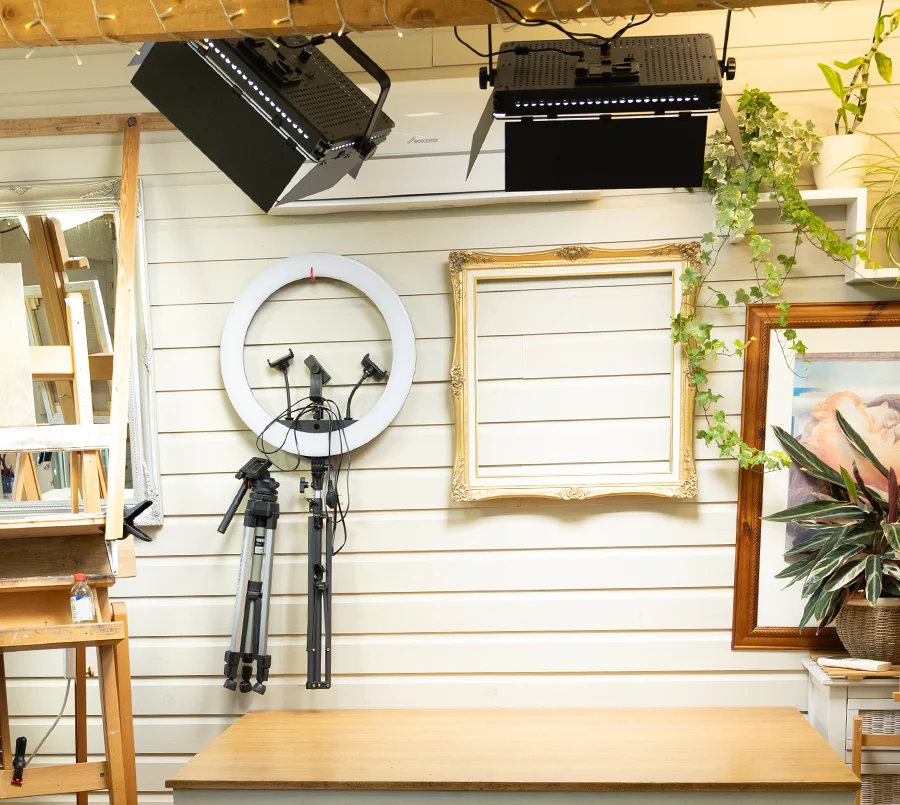
- Welcoming client seating area for consultations
- Office area for collaborative daily tasks
- Professional photography setup with lights
- Signing and finishing station for completed works
- View across grassy meadow for birdwatching
- Personal touch: every piece completed entirely by us
Our clients are always welcome to visit our studio. When customers collect their paintings or drawings we usually have a cuppa in our cozy cottage and then head down to the studio for the big reveal.
If clients would like to visit, please let us know and we can arrange a time. We always love meeting our clients!

Studio Life with Lily
Lily has plenty of beds in the studio, although she does love this rug. She not only has lots of beds in the studio she has a bed in every room of the cottage pretty much! She is very well looked after and quite content as you can see.
She will happily sleep on just about anything. When we open packaging from art materials she is the first to sleep on the cardboard. Leave a jumper on the floor and within minutes, she's claimed it.
With a Tibetan Terrier, nothing is truly yours. If it's soft and unattended, it's hers! She keeps us company wherever we are and always finds the coziest spot in the room.

Studio Life in Spring and Summer
When the spring and summer weather arrives, we make the most of it by having breakfast and lunch out in the garden, just outside the studio. It's a peaceful spot, shaded by trees that provide beautiful dappled light.
The birds and wildlife love it just as much as we do. Not to mention the chickens in the garden who often come and see us for leftovers if we let them out of their pen.
It's the perfect setting for a quiet break and a reminder of how lucky we are to work where we do.
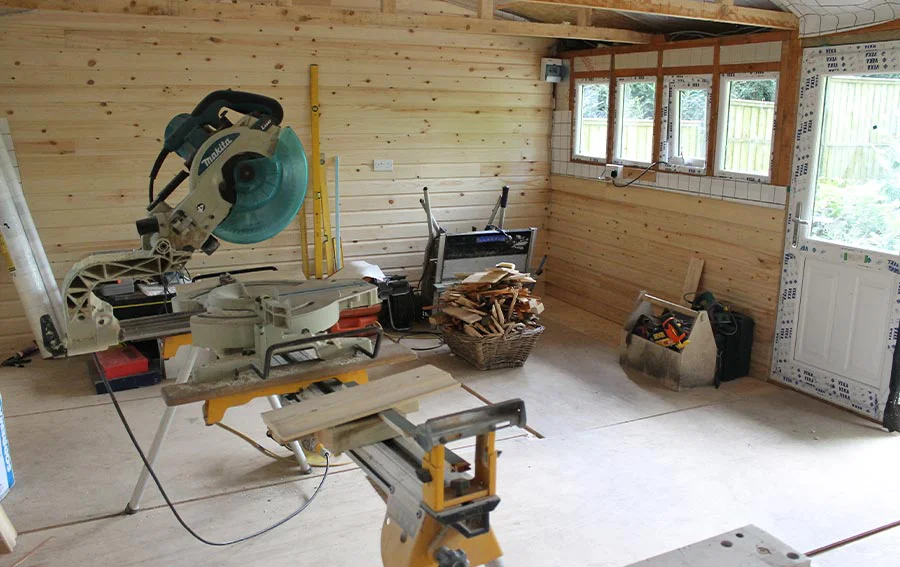
Renovating Our Art Studio
In 2014, we took the leap and transformed our old 20 x 14 foot garden workshop into a fully functioning art studio. Until then, we'd always worked from a spare room, but with our business growing, we knew it was time for a dedicated space built just for our needs.
Nestled in a peaceful corner of our garden, the studio is now the heart of everything we do. The renovation journey shows how we transformed a basic workshop into a professional, year-round creative space.
The Complete Renovation Process
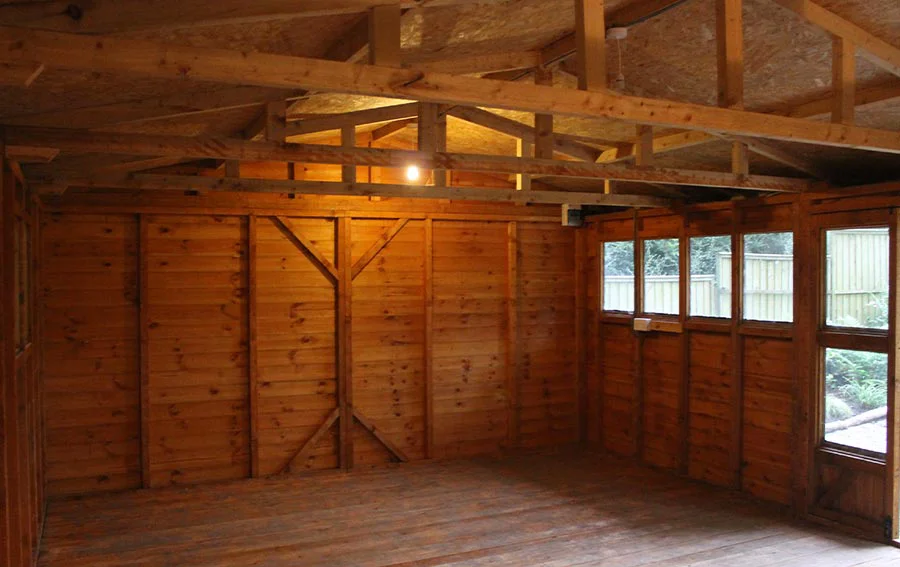
Here are just a handful of the hundreds of photos we took during the renovation process of our studio, which took about nine weeks from start to finish. The shed was a general purpose Workshop Shed that we bought locally. As you can see from the first photos it was bare bones. We had builders to renovate for us who employed electricians, plumbers and a specialist carpenter who did all our interior cladding beautifully.
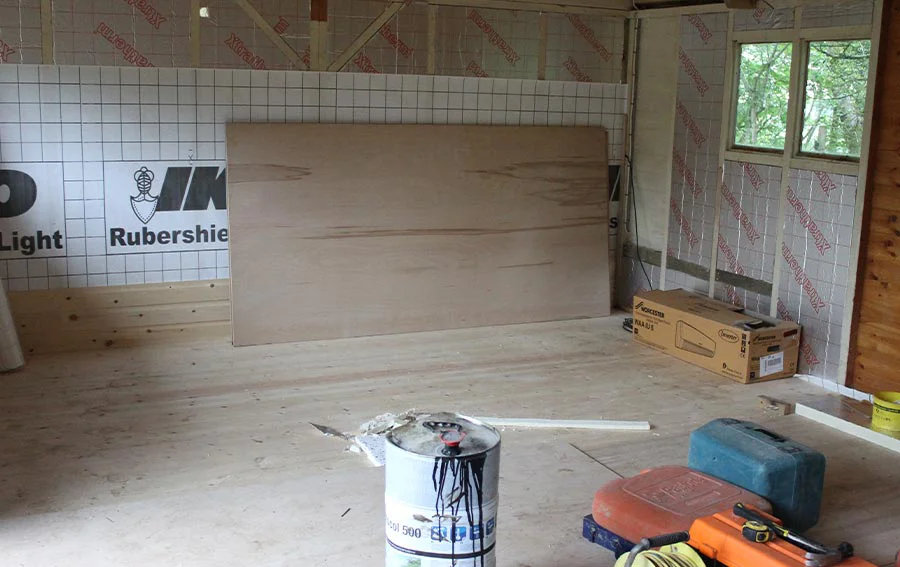
The first job was to insulate and lay a proper floor. We used Sellotex on the walls and roof, slotted in between the shed structure so we didn't lose any actual shed space. We had to plan where we wanted the writing, plugs, sink etc at this point so they would wire everything in before the cladding went on.
You can see the start of the cladding in the second photo. We were originally going to just have large sheets of hardboard and one feature wall of tongue in groove, but as it started to develop we loved the look and opted for tongue in groove for the whole of the inside.
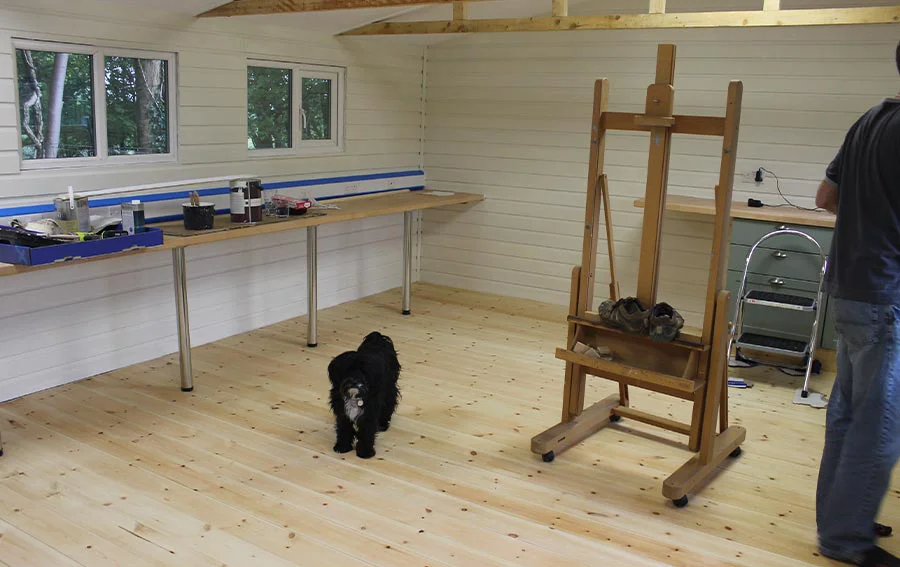
The Next Renovation Stages
This was the most exciting part for us. Seeing it all start to come together properly. New double glazed windows, proper double glazed door with side pannel and our worktop desk starting to form. Lily approved!!
Renovation Stages
- Stage 1: Stripped old workshop and lifted floor for insulation
- Stage 2: Wall insulation and tongue and groove paneling
- Stage 3: Double-glazed windows and doors installation
- Stage 4: Triple-layer felt roof and exterior finishing
- Stage 5: Floor varnishing and kitchen area setup
- Stage 6: Final painting and interior finishing
The transformation from bare-bones workshop to professional studio was remarkable. We varnished the floor about four times — it turned out so good it almost felt wrong to walk on it!
Our Professional Art Materials
We believe that creating timeless artwork starts with using the very best materials available. Every pencil, brush, canvas, and sheet of paper we use has been carefully selected to ensure the highest quality, longevity, and finish.
Whether it's Nicholas painting in oils or myself drawing in pencil, we use professional, archival-grade materials sourced from trusted suppliers here in the UK. This means that every portrait we create isn't just a likeness; it's a lasting keepsake made to stand the test of time.

Premium Canvas and Suppliers
Most of the materials we purchase are from Jackson's Art Supplies, a great UK-based art materials supplier with plenty of choice. They are very reliable and have a fast delivery service.
Our Trusted Suppliers
- Jackson's Art Supplies - main UK supplier
- Rosemarie's Brushes - amazing brush specialists
- Winsor and Newton - professional linen canvases
- Arches - watercolour paper for pencil drawings
- Professional, archival-grade materials only
I'm certain that most artists reading this will have heard of Jackson's; we do use others now and again, like Rosemarie's Brushes, who make the most amazing brushes! Highly recommended.
It's important to us that every portrait stands the test of time.

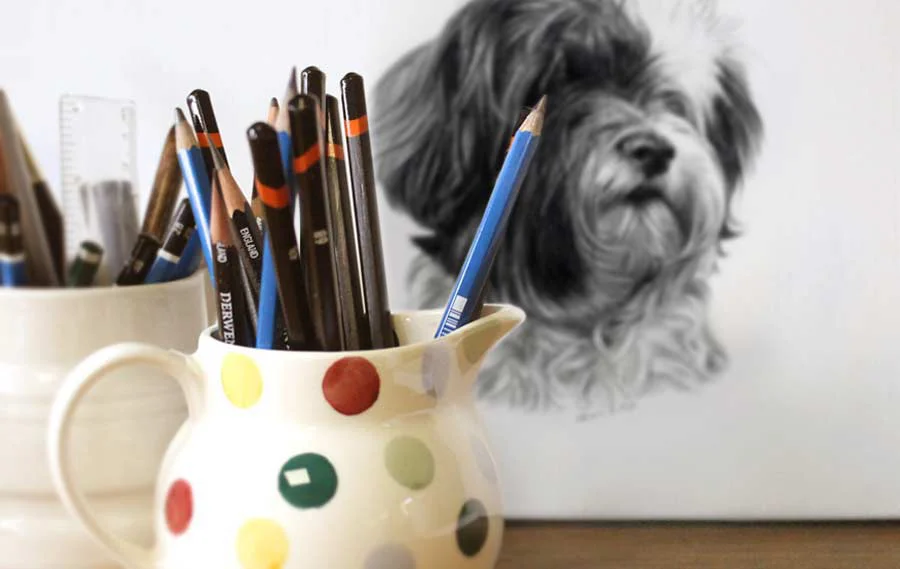
Choosing the Right Paper
Choosing the right paper is one of the most important decisions for a pencil artist. I spent many years working with Italian paper — I first discovered beautiful handmade papers on a trip to Florence in 1993 — and that period shaped my understanding of what good paper feels like. But over time I made the switch to Arches watercolour paper, and it has been a revelation.
Why I Use Arches Watercolour Paper
- 100% cotton rag — archival quality, acid-free
- Beautiful warm tone that suits graphite perfectly
- Smooth, strong surface that holds graphite with precision
- Exceptional durability — won't yellow or become brittle
- Cold-pressed surface gives graphite the ideal tooth
- Each sheet is consistent — no variation between batches
Arches is made in France and has been produced to the same standard for centuries. The surface is ideal for the layered graphite technique I use — it holds the pencil marks beautifully and allows for the subtle tonal variations that make the fur look real.
The paper is as much a part of the finished portrait as the pencil marks themselves. Getting it right makes everything else possible.
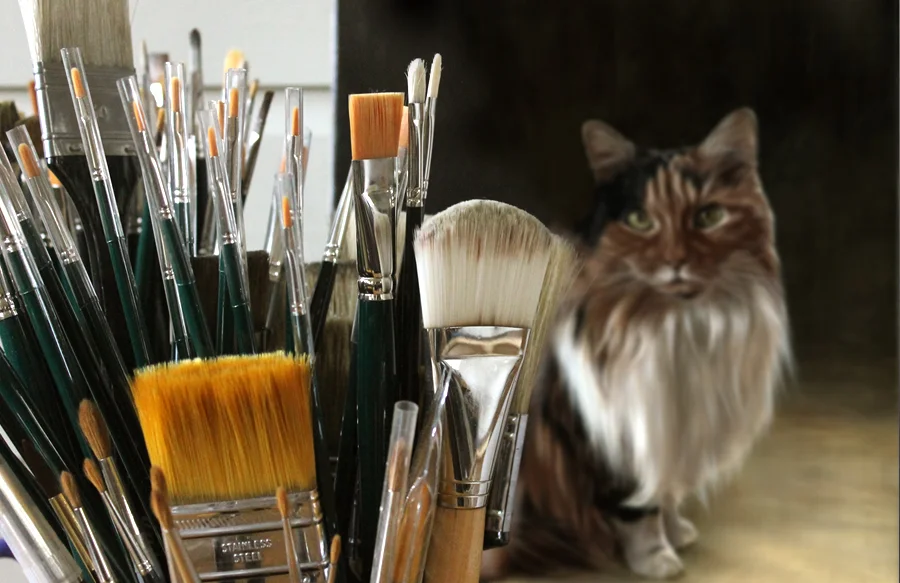
Professional Tools and Workflow
Every tool we use has been chosen for its quality and suitability for our specific techniques. From pencils to brushes to canvases, nothing is left to chance.
Our Essential Tools
- Pencils: Derwent, Faber-Castell, Mars Lumograph
- Brushes: Wide range of sizes and brands for different effects
- Oil paints: Traditional colors with personal palette preferences
- Canvases: Custom-sized for each commission
- Large brushes for soft, sweeping backgrounds
- Precision tools for detailed work
For my pencil work, I use a variety of trusted brands including Derwent, Faber-Castell, and Mars Lumograph. Each has its strengths, and I choose depending on the detail I'm working on.
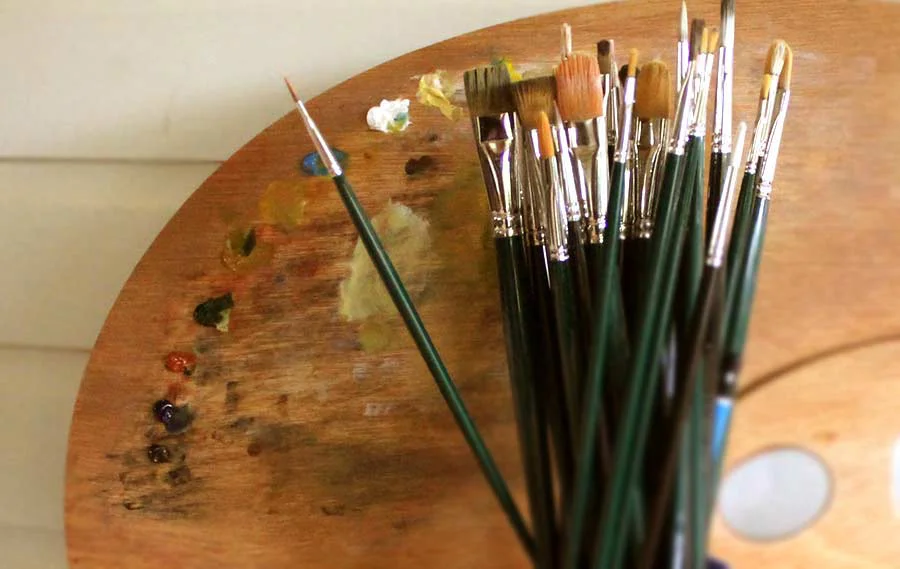
Nicholas's brushes and palette are key to his painting process. Every tool is fine-tuned to how he works, even down to his personal palette of colors, which is as individual as any artist's signature.
Good tools make all the difference when you are working at this level of precision. Each brush has its place and purpose; it's all part of the craft.
Commission a Portrait
Send us your favourite photos of your dog, cat, or horse and we will help you choose the perfect one for your portrait. We are happy to chat about any ideas you have for a portrait. We can’t wait to get started!